My relative brother just has his new born girl baby. I really excite about the news cause I can crochet something for her. But choosing what to make for her is really hard. First intention, I want to make her some dress but i cannot use yarn because it will be to hot for her(actually for everybody in Thailand lmao). If switch to cotton tread, it will took to much time and I cannot finish it before the family reunion will hold. After think about every factor, I decided to crochet a security blanket.
It is really fun to crochet this, with simple granny square and adding bunny head to it. Granny square is a classic crochet to work with, and result always stunning. Just simple changing color, you will end up with some unique piece of work!
As you can see from the picture, that my security blanket look fluffy because I use "Coral Fleece Yarn" that look like below photo. This yarn is hard to find in western, you may have to order them from Chinese website like alibaba, if you want to work with them. Or you can follow the link in the picture and ask them if they have international shipping service or not. Egret yarn is Thai local brand, the same brand that I use for this project. :)
I crochet two strand at the same time with the big hook, 5.0 mm hook, so it's very fluffy.
Alternatively, you can use any type of fluffy yarn that available in your area. And important tip to make your blanket look seamless is to use the yarn you work with, for sewing!
I normally cook by my self but not usually take a picture. Because our kitchen arrangement is not neat and beautiful as other food blogger have. Our family have an outdoor kitchen at the back of our house which surprisingly dark for outdoor, because the location of wall and roof. It make taking a good picture is really hard, this time I had to swish on all the light bulb in that area.
I have been subscribe Thai cooking channel on Youtube called Hot Thai Kitchen for sometime now. And recently she just cook one of my childhood favorite meal "Pad macaroni". This is the only way to cook pasta in my house. we don't cook mac and cheese or spaghetti carbonara sauce, we always do this to pasta that we have. And if you'r wonder why we don't try that, cause my family against it, they say western food are not flavorful enough for them. So every time I eager for other nation food I have cook in small proportion or mostly eat outside LOL.
So I decide to share my way to cook it, not recipe because I never measure the exact amount of ingredients. If you want exact recipe you can go to Youtube: Hot Thai Kitchen, her recipe are really great and authentic.
And today we cook "Pad macaroni Goong" which translate to Shrimp macaroni stir fried. Yummy, Easy, and sometime vegetarian. As you can see from the picture the main ingredient are
-Shrimp
-Onion and garlic
-Mixed Vegetables : Carrot, may kinds mushroom, tomato, baby corn, some type of pea
(any veggies we have in fridge actually, bell pepper, broccoli also work really well with this dish)
- Chinese celery, sometime we do spring onion.
Seasoning
- Ketchup
- Sriracha sauce
- Fish sauce
- Oyster sauce
- Soy sauce
- Golden mountain sauce (other type of soy sauce, maggi sauce is similar)
- White pepper
Cooking this is really easy and fast, just toss everything in to wok on high heat.
First garlic and onion together with a little bit of vegetable oil, stir it just a couple times.
Then toss all the mixed vegetables and shrimps. Keep the Chinese celery or spring onion last.
If you want vegetarian version just skip meat and fish sauce, we do this when we are on vegetarian festival (Thailand have a vegetarian festival around October every year.)
Stiring until the shrimps or your protein are nearly done.
Follow with cooked macaroni or other kind of pasta. After that season with ketchup and Sriracha sauce, the amount of sauce is depend on your test, should enough for thinly coast all the ingredient (less is fine but too much will make out dish soak).
Then season with Fish sauce, oyster sauce, soy sauce, and golden mountain sauce. The amount of this three sauce is depend on how much ketchup and Sriracha that you add. I always put them in with the ratio of 1: 1.5: 1 :1.5 for fish sauce, oyster sauce, soy sauce, and golden mountain sauce. This ratio will change from one household to another. And some recipe will add a little bit of sugar too, but we quit adding sugar to our meal long time ago to keep it more healthy.
Stir them together, tasted and adjust.
End with Chinese celery and a lot of white pepper.
Mixed together and finish!! Yummy yummy dish that may not look good but taste very good.
And here come the last one in three pokemons pattern. It took quite sometime for this little squirtle pattern to be published. Because it a long holiday in Thailand, I took a trip to visit my grandma and after that I feel lazy. LoL
It took me two days to be active again but my laptop was not active as I was. It so slow and had an unusual heat emitted from itself(I think it because the summer heat here 41-43 Celsius). So I have to wait until nighttime so it can run normally. I wish I can afford air condition in our living room so summer time won't be this hot.
Moreover, while I was editing the video tutorial, there was black out! As you can guess, I didn't save my work so I have to do the editing all over again. I really wanna cry at that time but finally the video is published.
[Video tutorial]
Pattern instruction
Head
Rnd1: Make an adjustable ring and work 6 sc in the ring, sl :: 6 stitches
Rnd2: 1 ch, [2 sc in next stitch] 6 times, sl :: 12 stitches
Rnd3: 1 ch, [sc in next stitch, 2 sc in next stitch] 6 times, sl :: 18 stitches
Rnd4: 1 ch, [sc in next 2 stitch, 2 sc in next stitch] 6 times, sl :: 24 stitches
Rnd5: 1 ch, [sc in next 3 stitch, 2 sc in next stitch] 6 times, sl :: 30 stitches
Rnd6: 1 ch, sc in next 30 stitch, sl :: 30 stitches
Rnd7: 1 ch, sc in next 30 stitch, sl :: 30 stitches
Rnd8: 1 ch, sc in next 30 stitch, sl :: 30 stitches
Rnd9: 1 ch, sc in next 30 stitch, sl :: 30 stitches
Rnd10: 1 ch, [sc in next 4 stitch, 2 sc in next stitch] 6 times, sl :: 36 stitches
Rnd11: 1 ch, sc in next 36 stitch, sl :: 36 stitches
Rnd12: 1 ch, [sc in next 4 stitch, sc2tog] 6 times, sl :: 30 stitches
Rnd13: 1 ch, [sc in next 3 stitch, sc2tog] 6 times, sl :: 24 stitches
Rnd14: 1 ch, [sc in next 2 stitch, sc2tog] 6 times, sl :: 18 stitches
Rnd15: 1 ch, [sc in next stitch, sc2tog] 6 times, sl :: 12 stitches
Rnd16: 1 ch, [sc2tog] 6 times, sl :: 6 stitches
Fasten off.
Body
Rnd1: Make an adjustable ring and work 6 sc in the ring, sl :: 6 stitches
Rnd2: 1 ch, [2 sc in next stitch] 6 times, sl :: 12 stitches
Rnd3: 1 ch, [sc in next stitch, 2 sc in next stitch] 6 times, sl :: 18 stitches
Rnd4: 1 ch, [sc in next 2 stitch, 2 sc in next stitch] 6 times, sl :: 24 stitches
Rnd5: 1 ch, sc in next 24 stitch, sl :: 24 stitches
Rnd6: 1 ch, sc in next 24 stitch, sl :: 24 stitches
Rnd7:1 ch, [sc in next 2 stitch, sc2tog] 6 times, sl :: 18 stitches
Rnd8: 1 ch, sc in next 18 stitch, sl :: 18 stitches
Rnd9: 1 ch, sc in next 18 stitch, sl :: 18 stitches
Rnd10: 1 ch, [sc in next stitch, sc2tog] 6 times, sl :: 12 stitches
Rnd11: 1 ch, sc in next 12 stitch, sl :: 12 stitches
Fasten off
Arms And Legs
Rnd1: Make an adjustable ring and work 6 sc in the ring, sl :: 6 stitches
Rnd2: 1 ch, sc in next 6 stitch, sl :: 6 stitches
Fasten off
Carapace
Rnd1: Make an adjustable ring and work 6 sc in the ring, sl :: 6 stitches
Rnd2: 1 ch, [2 sc in next stitch] 6 times, sl :: 12 stitches
Rnd3: 1 ch, [sc in next stitch, 2 sc in next stitch] 6 times, sl :: 18 stitches
Rnd4: 1 ch, sc in next 18 stitch, sl :: 18 stitches
Change to white yarn.
Rnd5: 1 ch, sc in next 18 stitch, sl :: 18 stitches
Fasten off
Tails
Rnd1: Make an adjustable ring and work 6 sc in the ring
Rnd2: 2 sc in next stitch, 2 hdc in next 3 stitch, 1 ch, turn
Rnd3: sc in next 2 stitch, 1 ch, turn
Rnd4: sc in next 2 stitch, 1 ch, turn
Fasten off
Stitch every parts together, the more neat you stitch, the more proper look it will be. But sewing can be annoying job for many people, and if you are not familiar with sewing you doll may not turn out as you want. Tip is to make sure that they are symmetry for both arms and legs, left and right. You can also glue them, if you really hate sewing, but be careful not to put too much glue, so it not clearly visible and reduce chance to dirty other parts.
After that, the most important assemble is the face! Even tough you mass up on sewing arms and legs, or your hand tension was not equal during crochet process. The most important things is you have to make sure the face of the doll is cute! Using pins to guide where you are going to stitch or embroidery first hand before doing the real job. And optional choice, adding pink cheek under the eyes area, this things add load of cuteness to our Squirtle.
I hope you guys like this pattern. If you have any question leave the comment here or at instruction video. Or else message me through my facebook page(www.facebook.com/pianosound) for quicker response.
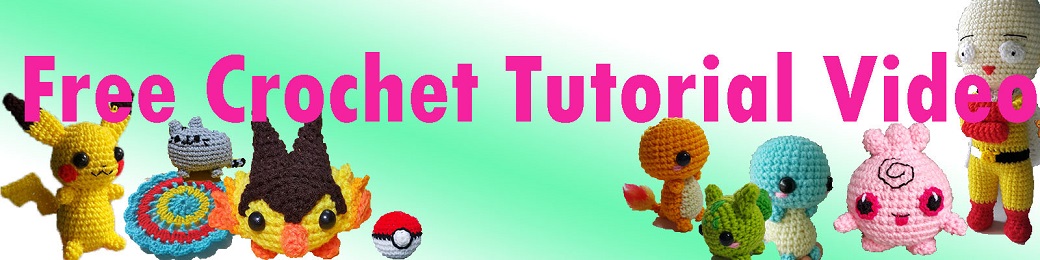
My junior contacted me, and asked if I could make some pokemon doll for him. So I said okay, since I have some free time. At first, I was thinking about to sell these pattern, but after finish one of them I realize that the pattern is too simple for sell. Then just give it for free. LOL
For those of you who don't know this character. It's Charmander from pokemon series. Charmander is one of the three starter pokemon. I didn't made him to look exactly as he is in game or anime, I change his appearance according to my junior's request. Make him more to the cute side, and the result is what you are seeing now in the picture. I hope you like this pattern.
[Video Tutorial]
Pattern instruction Head
Rnd1: Make an adjustable ring and work 6 sc in the ring, sl :: 6 stitches
Rnd2: 1 ch, [2 sc in next stitch] 6 times, sl :: 12 stitches
Rnd3: 1 ch, [sc in next stitch, 2 sc in next stitch] 6 times, sl :: 18 stitches
Rnd4: 1 ch, [sc in next 2 stitch, 2 sc in next stitch] 6 times, sl :: 24 stitches
Rnd5: 1 ch, [sc in next 3 stitch, 2 sc in next stitch] 6 times, sl :: 30 stitches
Rnd6: 1 ch, sc in next 30 stitch, sl :: 30 stitches
Rnd7: 1 ch, sc in next 30 stitch, sl :: 30 stitches
Rnd8: 1 ch, sc in next 30 stitch, sl :: 30 stitches
Rnd9: 1 ch, sc in next 30 stitch, sl :: 30 stitches
Rnd10: 1 ch, [sc in next 4 stitch, 2 sc in next stitch] 6 times, sl :: 36 stitches
Rnd11: 1 ch, sc in next 36 stitch, sl :: 36 stitches
Rnd12: 1 ch, [sc in next 4 stitch, sc2tog] 6 times, sl :: 30 stitches
Rnd13: 1 ch, [sc in next 3 stitch, sc2tog] 6 times, sl :: 24 stitches
Rnd14: 1 ch, [sc in next 2 stitch, sc2tog] 6 times, sl :: 18 stitches
Rnd15: 1 ch, [sc in next stitch, sc2tog] 6 times, sl :: 12 stitches
Rnd16: 1 ch, [sc2tog] 6 times, sl :: 6 stitches
Fasten off.
Body
Color
Orange
white
Orange
stitches
Rnd1
Make an adjustable ring and work 6 sc in the
ring, sl
6
Rnd2
1 ch, 2 sc in next stitch
[2 sc in next stitch] 2 times
[2 sc in next stitch] 3 times, sl
12
Rnd3
1 ch, sc in next stitch, 2 sc in next stitch
[sc in next stitch, 2 sc in next stitch] 2 times
[sc in next stitch, 2 sc in next stitch] 3 times, sl
18
Rnd4
1 ch, sc in next 2 stitch, 2 sc in next
stitch
[sc in next 2 stitch, 2 sc in next stitch] 2 times
[sc in next 2 stitch, 2 sc in next stitch] 3 times, sl
24
Rnd5
1
ch, sc in next 4 stitch,
sc in next 8 stitch,
sc in next 12 stitch, sl
24
Rnd6
1
ch, sc in next 4 stitch,
sc in next 8 stitch,
sc in next 12 stitch, sl
24
Rnd7
1
ch, sc in next 2 stitch, sc2tog
[sc in next 2 stitch, sc2tog] 2 times, sl
[sc in next 2 stitch, sc2tog] 3 times, sl
18
Rnd8
1
ch, sc in next 3 stitch,
sc in next 6 stitch,
sc in next 9 stitch, sl
18
Rnd9
1
ch, sc in next 3 stitch,
sc in next 6 stitch,
sc in next 9 stitch, sl
18
Rnd10
1
ch, sc in next stitch, sc2tog
[sc in next stitch, sc2tog] 2 times, sl
[sc in next stitch, sc2tog] 3 times, sl
12
Rnd11
1
ch, sc in next 2 stitch,
sc in next 4 stitch,
sc in next 6 stitch, sl
12
Tail
Rnd1: Make an adjustable ring and work 4 sc in the ring, sl :: 4 stitches
Rnd2: 1 ch, sc in next 4 stitch, sl :: 4 stitches
Rnd3: 1 ch, [sc in next stitch, 2 sc in next stitch] 2 times, sl :: 6 stitches
Rnd4: 1 ch, sc in next 6 stitch, sl :: 6 stitches
Rnd5: 1 ch, [sc in next 2 stitch, 2 sc in next stitch] 2 times, sl :: 8 stitches
Rnd6: 1 ch, [sc in next 3 stitch, 2 sc in next stitch] 2 times, sl :: 10 stitches
Arms
Rnd1: Make an adjustable ring and work 5 sc in the ring, sl :: 5 stitches
Rnd2: 1 ch, sc in next 5 stitch, sl :: 5 stitches
Legs
Rnd1: Make an adjustable ring and work 6 sc in the ring, sl :: 6 stitches
Rnd2: 1 ch, sc in next 6 stitch, sl :: 6 stitches
Sewing arms and feet can be annoying job for many people, and if you are not familiar with sewing you doll may not turn out as you want. Tip is to make sure that they are symmetry for both arms and legs, left and right. You can also glue them, if you really hate sewing, but be careful not to put too much glue, so it not clearly visible and reduce chance to dirty other part.
After that, the most important assemble is the face! Even tough you mass up on sewing arms and legs, or your hand tension was not equal during crochet process. The most important things is you have to make sure the face of the doll is cute! Using pins to guide where you are going to stitch or embroidery first hand before doing the real job. And optional choice, adding pink cheek under the eyes area, this things add load of cuteness to Charmander.
Cannot find safety eye!!
Alternative way for making eye, you can either do embroidery, or crochet them. Or if you have felt sheet, cut it into circle and sewing or glue them to make eyes.
For it's fire tail, use yarn indicator brush to brush the yarn out. But if you cannot find yarn brush you can substitute it with dog slicker brush(that have the same structure as the picture below)
Now Charmander is finished! you can either attach keychain to it, or just left him as decorated doll. If you want a bigger doll, double the strand of yarn and crochet with bigger hook. These three pokemons are really fun to made simple and fast. And good for present to all the pokemon fan.
Other pokemon pattern Squirtle pattern : http://amigurumipianosound.blogspot.com/2016/04/squirtle-zenigame-pokemon-pattern.html Balbasaur pattern :http://amigurumipianosound.blogspot.com/2016/04/bulbasuar-fushigidane-pokemon-free.html
******SELLING THE DOLL YOU MADE******
Visit private policy for more detail: https://amigurumipianosound.blogspot.co.uk/p/pattern-poly.html
*/*/* Helping translate from English to other language here: http://www.youtube.com/timedtext_cs_panel?tab=2&c=UCO6B-ObiFoh3cOemJQfoSJA
--------------------------------
FOLLOW ME ON
Youtube : https://www.youtube.com/channel/UCO6B-ObiFoh3cOemJQfoSJA
FACEBOOK: https://www.facebook.com/pianosound
Instagram: https://www.instagram.com/amigurumipianosound/
BLOGGER : https://amigurumipianosound.blogspot.com/
--------------------------------
SUPPORT this channel through:
Patreon :https://www.patreon.com/AmigurumiPianosound
Or purchase my paid pattern at
Craftsy : https://www.craftsy.com/user/2234916/pattern-store
ETSY: https://www.etsy.com/shop/Pianosound
RAVELRY : http://www.ravelry.com/patterns/sources/noramon-drons-ravelry-store/patterns
This Bulbasaur, in my opinion, it doesn't look like bulbasaur at all. But my brother who requested this, said he love him. LOL
At first, I want to make him look as similar as Bulbarsuar as I can. But my brother handed me the skate, and insist that he want him to be round like this. So I have no other choice, and do what he want.
Even though it look a little bit odd, but at least it oddly cute, don't you agree. :)
Enough for little chat, let's straight to the pattern!
Pattern instruction
MATERIALS: 4 ply worsted weight yarn
I used local brand named "eagle"
3.5mm. hook, I used 6/0 japanese tuplip hook.
ABBREVIATION
ch- chain
sc- single crochet
dc - double crochet
sl- slip stitch
sc2tog- decrease single crochet Body
Rnd1: Make an adjustable ring and work 6 sc in the ring, sl :: 6 stitches
Rnd2: 1 ch, [2 sc in next stitch] 6 times, sl :: 12 stitches
Rnd3: 1 ch, [sc in next stitch, 2 sc in next stitch] 6 times, sl :: 18 stitches
Rnd4: 1 ch, [sc in next 2 stitch, 2 sc in next stitch] 6 times, sl :: 24 stitches
Rnd5: 1 ch, [sc in next 3 stitch, 2 sc in next stitch] 6 times, sl :: 30 stitches
Rnd6: 1 ch, sc in next 30 stitch, sl :: 30 stitches
Rnd7: 1 ch, sc in next 30 stitch, sl :: 30 stitches
Rnd8: 1 ch, sc in next 30 stitch, sl :: 30 stitches
Rnd9: 1 ch, sc in next 30 stitch, sl :: 30 stitches
Rnd10: 1 ch, [sc in next 3 stitch, sc2tog] 6 times, sl :: 24 stitches
Rnd11: 1 ch, sc in next 24 stitch, sl :: 24 stitches
Rnd12: 1 ch, sc in next 24 stitch, sl :: 24 stitches
Rnd13: 1 ch, [sc in next 2 stitch, sc2tog] 6 times, sl :: 18 stitches
Rnd14: 1 ch, sc in next 18 stitch, sl :: 18 stitches
Rnd15: 1 ch, [sc in next stitch, sc2tog] 6 times, sl :: 12 stitches
Rnd16: 1 ch, [sc2tog] 6 times, sl :: 6 stitches
Fasten off.
Bud
Rnd1: Make an adjustable ring and work 6 dc in the ring, sl :: 6 stitches
Rnd2: 3 ch, [2 dc in next stitch] 6 times, sl :: 12 stitches
Rnd3: 3 ch, [2 dc in next 2 stitch, dc in next 2 stitch] 3 times, sl :: 18 stitches
Rnd4: 3 ch, [sc2tog] 9 times, sl :: 9 stitches
Fasten off.
Legs
Rnd1: Make an adjustable ring and work 7 dc in the ring, sl :: 7 stitches
Ears
Rnd1: Make an adjustable ring and work 6 dc in the ring, sl :: 6 stitches
Rnd2: 3 ch, [dc in next stitch, 2 sc in next stitch] 3 times, sl :: 9 stitches
Sewing every parts together (you can also glue them, if you really hate sewing, but be careful not to put too much glue, so it not clearly visible and reduce chance to dirty other part), and use darker green to embroidery triangle on his face. And some pink yarn, as optional, embroidery pink cheek to increase the cuteness!
Cannot find safety eye!!
Alternative way for making eye, you can either do embroidery, or crochet them. Or if you have felt sheet, cut it into circle and sewing or glue them to make eyes.
That's it, now you have little Bulbasuar! Any problems during crochet him, comment here or under the tutorial viseo, I will answer as fast as I can.
******SELLING THE DOLL YOU MADE******
Visit private policy for more detail: https://amigurumipianosound.blogspot.co.uk/p/pattern-poly.html
*/*/* Helping translate from English to other language here: http://www.youtube.com/timedtext_cs_panel?tab=2&c=UCO6B-ObiFoh3cOemJQfoSJA
--------------------------------
FOLLOW ME ON
Youtube : https://www.youtube.com/channel/UCO6B-ObiFoh3cOemJQfoSJA
FACEBOOK: https://www.facebook.com/pianosound
Instagram: https://www.instagram.com/amigurumipianosound/
BLOGGER : https://amigurumipianosound.blogspot.com/
--------------------------------
SUPPORT this channel through:
Patreon :https://www.patreon.com/AmigurumiPianosound
Or purchase my paid pattern at
Craftsy : https://www.craftsy.com/user/2234916/pattern-store
ETSY: https://www.etsy.com/shop/Pianosound
RAVELRY : http://www.ravelry.com/patterns/sources/noramon-drons-ravelry-store/patterns